
 Spring Boot 基础
# Spring Boot
# 什么是 IOC
Inversion of Control(IoC)控制反转,通过 DI 依赖注入(Dependency Injection)的方式(如 @Autowired 注入)实现对象之间的松耦合关系。程序运行时,依赖对象由辅助程序动态生成并注入到被依赖对象中,动态绑定两者的使用关系
- Bean 是 Spring 统一管理的对象,我们的 Spring 程序由一个个 bean 组成,bean 由 Spring 中的 IoC 进行管理
Spring IoC 容器就是这样的辅助程序,它负责对象的生成和依赖的注入,然后再交由程序员使用,故而在 Spring 中,你不需要自己创建对象,你只需要告诉 Spring,哪些类我需要创建出对象,然后在启动项目的时候 Spring 就会自动帮你创建出该对象,并且只存在一个类的实例。这个类的实例在 Spring 中被称为 Bean。而这种模式,我们称之为单例模式
通常,我们使用 Java 注解配置来实现 Bean 的注册和使用(通过反射机制)
# Bean 的声明和注入
Java 注解配置声明 Bean
- @Component
- @Service
- @Repository
- @Controller
以上四种声明方式效果完全一致,使用不同的关键词是为了给阅读的人能够快速了解该类属于哪一层
此外,@Bean 一般和 @Component 或者 @Configuration 一起使用,创建一些组合的 Bean
@Configuration
public class MyService{
    public MyService(){
        System.out.println("nmsl");
    }

    @Bean
    public String strObj(){
        return "wdnmd";
    }

    @Bean
    public Integer intObj(){
        return 2084;
    }
}
2
3
4
5
6
7
8
9
10
11
12
13
14
15
16
这样 Spring 中就会存在两个叫做 strObj 和 intObj 的对象,其值分别为 "wdnmd" 和 2084
@Configuration 和 @Component 注解的区别:@Configuration 注解可以让 @Bean 注解对象依赖于当前配置类的其它 Bean
注入 Bean
- @Autowired
- @Inject
- @Resource
在具体注入时,又有三种注入方式,以 @Autowired 为例
变量注入(不推荐)
@Autowired
JdbcTemplate jdbcTemplate
2
构造器注入
final UserDao userDao;

@Autowired
public UserServiceImpl(UserDao userDao) {
    this.userDao = userDao;
}
2
3
4
5
6
set 方法注入
//set方法注入
private JdbcTemplate jdbcTemplate;
@Autowired
public void setJdbcTemplate(JdbcTemplate jdbcTemplate){
    this.jdbcTemplate = jdbcTemplate;
}
2
3
4
5
6
# 什么是 AOP
面向切面编程,Aspect Oriented Programming
- AOP是对面向对象编程的一个补充
- 它的目的是将复杂的需求分解为不同的切面,将散布在系统中的公共功能集中解决
- 它的实际含义是在运行时将代码切入到类的指定方法、指定位置上,将不同方法的同一个位置抽象为一个切面对象,并对该对象进行编程
引入依赖
<dependency>
    <groupId>org.springframework.boot</groupId>
    <artifactId>spring-boot-starter-aop</artifactId>
</dependency>
<dependency>
    <groupId>org.mybatis.spring.boot</groupId>
    <artifactId>mybatis-spring-boot-starter</artifactId>
</dependency>
2
3
4
5
6
7
8
引入 AOP 机制围绕 SQL 事务,实现对数据库日志的记录
配置数据库,并创建 Log 数据库表
spring.datasource.url=jdbc:mysql://localhost:3306/test?useUnicode=true&characterEncoding=utf-8&useSSL=false
spring.datasource.username=root
spring.datasource.password=123456
spring.datasource.driver-class-name=com.mysql.jdbc.Driver
2
3
4
@Setter
@Getter
public class Log {
    @JsonSerialize(using= ToStringSerializer.class)
    private Long id;
    @JsonSerialize(using=ToStringSerializer.class)
    private Long uid;
    private String username;
    private Integer type;
    private String obj;
    private Integer result;
    private String description;

    private Integer deleted;
    private Date gmtCreate;
    private Date gmtModified;

    public Log() {
        Date time = ZaykTimeStamp.getTimeStampInfo().getTime();
        this.gmtCreate=time;
        this.gmtModified = time;
    }
    public Log(Integer type, String obj, Integer result, String description) {
        this.type = type;
        this.obj = obj;
        this.result = result;
        this.description = description;
        Date time = ZaykTimeStamp.getTimeStampInfo().getTime();
        this.gmtCreate=time;
        this.gmtModified = time;
    }

    @Override
    public String toString() {
        return "log{" + "id=" + id + ", uid=" + uid + ", username='" + username + '\'' +
                ", type=" + type +  ", obj='" + obj + '\'' + ", result=" + result +
                ", description='" + description + '\'' + ", deleted=" + deleted +
                ", gmtCreate=" + gmtCreate + ", gmtModified=" + gmtModified + '}';
    }
}
2
3
4
5
6
7
8
9
10
11
12
13
14
15
16
17
18
19
20
21
22
23
24
25
26
27
28
29
30
31
32
33
34
35
36
37
38
39
40
# Spring Boot 常用注解
| 注解 | 用在 | 作用 |
|---|---|---|
| @Controller | controller | 声明为接口类 |
| @ResponseBody | controller | 声明当前接口类方法的返回值,将以特定的格式写入到 response 的 body 区域,进而将数据返回给客户端。当方法上面没有 ResponseBody ,底层会将方法的返回值封装为 ModelAndView 对象。如果返回值是字符串,那么直接将字符串写到客户端;如果是一个对象,会将对象转化为 json 串,然后写到客户端 |
| @RestController | controller | @Controller + @ResponseBody |
| @RequestMapping | controller | Post 接口,相关传参注解:@PathVariable、@RequestParam |
| @GetMapping | controller | Get 接口 |
| @Test | test | 声明为一个测试方法 |
| @Transaction | dao/mapper | 声明方法为事务,失败将回滚 |
# Spring MVC 到 Boot
Spring MVC 是 Spring 框架的 Web 模块,专注 MVC 模式的 Web 开发
而 Spring Boot 基于 Spring MVC,通过自动配置、起步依赖和嵌入式容器三大核心特性,简化了配置和部署,实现开箱即用
# Spring Boot 依赖树
什么叫自动配置和起步依赖?随便找了一个 Spring Boot 3.2.6 的项目,JDK 版本为 17,其 Maven 依赖如下
<dependencies>
    <!--  分词算法  -->
    <dependency>
        <groupId>com.hankcs</groupId>
        <artifactId>hanlp</artifactId>
        <version>portable-1.7.6</version>
    </dependency>
    <!-- lombok-->
    <dependency>
        <groupId>org.projectlombok</groupId>
        <artifactId>lombok</artifactId>
        <version>1.18.20</version>
    </dependency>

    <!-- JPBC -->
    <dependency>
        <groupId>jpbc.api</groupId>
        <artifactId>api</artifactId>
        <version>2.0.0</version>
        <scope>system</scope>
        <systemPath>${pom.basedir}/lib/jpbc-api-2.0.0.jar</systemPath>
    </dependency>
    <dependency>
        <groupId>jpbc-plaf</groupId>
        <artifactId>plaf</artifactId>
        <version>2.0.0</version>
        <scope>system</scope>
        <systemPath>${pom.basedir}/lib/jpbc-plaf-2.0.0.jar</systemPath>
    </dependency>


    <dependency>
        <groupId>org.springframework.boot</groupId>
        <artifactId>spring-boot-starter</artifactId>
    </dependency>

    <dependency>
        <groupId>org.springframework.boot</groupId>
        <artifactId>spring-boot-starter-security</artifactId>
    </dependency>
    <dependency>
        <groupId>org.springframework.boot</groupId>
        <artifactId>spring-boot-starter-test</artifactId>
    </dependency>
    <dependency>
        <groupId>org.springframework.boot</groupId>
        <artifactId>spring-boot-starter-thymeleaf</artifactId>
    </dependency>
    <dependency>
        <groupId>org.springframework.boot</groupId>
        <artifactId>spring-boot-starter-web</artifactId>
    </dependency>

    <!-- junit -->
    <dependency>
        <groupId>org.junit.jupiter</groupId>
        <artifactId>junit-jupiter</artifactId>
        <version>5.8.2</version>
    </dependency>

    <dependency>
        <groupId>com.opencsv</groupId>
        <artifactId>opencsv</artifactId>
        <version>5.6</version>
    </dependency>
</dependencies>
2
3
4
5
6
7
8
9
10
11
12
13
14
15
16
17
18
19
20
21
22
23
24
25
26
27
28
29
30
31
32
33
34
35
36
37
38
39
40
41
42
43
44
45
46
47
48
49
50
51
52
53
54
55
56
57
58
59
60
61
62
63
64
65
66
在根目录执行
mvn dependency:tree
得到该项目的 maven 依赖树
[INFO] cia.arkrypto:Ark-Searchable-Encryption:jar:1.0-SNAPSHOT
[INFO] +- com.hankcs:hanlp:jar:portable-1.7.6:compile
[INFO] +- org.projectlombok:lombok:jar:1.18.20:compile
[INFO] +- jpbc.api:api:jar:2.0.0:system
[INFO] +- jpbc-plaf:plaf:jar:2.0.0:system
[INFO] +- org.springframework.boot:spring-boot-starter:jar:3.2.6:compile
[INFO] |  ......
[INFO] +- org.springframework.boot:spring-boot-starter-security:jar:3.2.6:compile
[INFO] |  ......
[INFO] +- org.springframework.boot:spring-boot-starter-test:jar:3.2.6:compile
[INFO] |  ......
[INFO] +- org.springframework.boot:spring-boot-starter-thymeleaf:jar:3.2.6:compile
[INFO] |  ......
[INFO] +- org.springframework.boot:spring-boot-starter-web:jar:3.2.6:compile
[INFO] |  ......
[INFO] +- org.junit.jupiter:junit-jupiter:jar:5.8.2:compile
[INFO] |  ......
[INFO] \- com.opencsv:opencsv:jar:5.6:compile
[INFO]    \- ......
[INFO] ------------------------------------------------------------------------
2
3
4
5
6
7
8
9
10
11
12
13
14
15
16
17
18
19
20
我们一点点来看一下这棵树
[INFO] +- com.hankcs:hanlp:jar:portable-1.7.6:compile
[INFO] +- org.projectlombok:lombok:jar:1.18.20:compile
[INFO] +- jpbc.api:api:jar:2.0.0:system
[INFO] +- jpbc-plaf:plaf:jar:2.0.0:system
2
3
4
这是工具库和外部包,他们仅由单个包组成
然后是spring-boot-starter,它包括
[INFO] +- org.springframework.boot:spring-boot-starter:jar:3.2.6:compile
[INFO] |  +- org.springframework.boot:spring-boot:jar:3.2.6:compile
[INFO] |  |  \- org.springframework:spring-context:jar:6.1.8:compile # Spring 上下文,管理 Bean 的生命周期
[INFO] |  +- org.springframework.boot:spring-boot-autoconfigure:jar:3.2.6:compile # 自动装配
[INFO] |  +- org.springframework.boot:spring-boot-starter-logging:jar:3.2.6:compile # 日志依赖
[INFO] |  |  +- ch.qos.logback:logback-classic:jar:1.4.14:compile
[INFO] |  |  |  \- ch.qos.logback:logback-core:jar:1.4.14:compile
[INFO] |  |  +- org.apache.logging.log4j:log4j-to-slf4j:jar:2.21.1:compile
[INFO] |  |  |  \- org.apache.logging.log4j:log4j-api:jar:2.21.1:compile
[INFO] |  |  \- org.slf4j:jul-to-slf4j:jar:2.0.13:compile
[INFO] |  +- jakarta.annotation:jakarta.annotation-api:jar:2.1.1:compile # 注解
[INFO] |  +- org.springframework:spring-core:jar:6.1.8:compile # Spring Core
[INFO] |  |  \- org.springframework:spring-jcl:jar:6.1.8:compile
[INFO] |  \- org.yaml:snakeyaml:jar:2.2:compile # Yaml 解析
2
3
4
5
6
7
8
9
10
11
12
13
14
可以发现,它囊括了一些 Spring Web 框架的核心库,如
- 配置
spring-boot-autoconfigure - 日志
spring-boot-starter-logging - 注解
jakarta.annotation-api - yaml 文件解析
snakeyaml
需要特别注意spring-core和spring-context的依赖路径,这是 Spring Web 框架的核心,可以看到
org.springframework.boot:spring-boot:jar:3.2.6:compile → org.springframework:spring-context:jar:6.1.8:compile
org.springframework:spring-core:jar:6.1.8:compile → org.springframework:spring-jcl:jar:6.1.8:compile
2
- Spring Core:Spring 核心工具类
- Spring Context:Spring 上下文容器,管理 Bean 的生命周期
然后是spring-boot-starter-web
[INFO] +- org.springframework.boot:spring-boot-starter-web:jar:3.2.6:compile
[INFO] |  +- org.springframework.boot:spring-boot-starter-json:jar:3.2.6:compile
[INFO] |  |  +- com.fasterxml.jackson.core:jackson-databind:jar:2.15.4:compile # JSON 解析
[INFO] |  |  |  +- com.fasterxml.jackson.core:jackson-annotations:jar:2.15.4:compile
[INFO] |  |  |  \- com.fasterxml.jackson.core:jackson-core:jar:2.15.4:compile
[INFO] |  |  +- com.fasterxml.jackson.datatype:jackson-datatype-jdk8:jar:2.15.4:compile
[INFO] |  |  +- com.fasterxml.jackson.datatype:jackson-datatype-jsr310:jar:2.15.4:compile
[INFO] |  |  \- com.fasterxml.jackson.module:jackson-module-parameter-names:jar:2.15.4:compile
[INFO] |  +- org.springframework.boot:spring-boot-starter-tomcat:jar:3.2.6:compile # 内置 Tomcat
[INFO] |  |  +- org.apache.tomcat.embed:tomcat-embed-core:jar:10.1.24:compile
[INFO] |  |  +- org.apache.tomcat.embed:tomcat-embed-el:jar:10.1.24:compile
[INFO] |  |  \- org.apache.tomcat.embed:tomcat-embed-websocket:jar:10.1.24:compile
[INFO] |  +- org.springframework:spring-web:jar:6.1.8:compile
[INFO] |  |  \- io.micrometer:micrometer-observation:jar:1.12.6:compile
[INFO] |  |     \- io.micrometer:micrometer-commons:jar:1.12.6:compile
[INFO] |  \- org.springframework:spring-webmvc:jar:6.1.8:compile # Spring MVC
2
3
4
5
6
7
8
9
10
11
12
13
14
15
16
可以关注几个有意思的依赖
- 内置的 tomcat:
spring-boot-starter-tomcat - 封装在其中的 webmvc:
spring-webmvc - json 解析器:
jackson-databind
最后可以看看spring-boot-starter-security,里面包含了两个很重要的类:beans和aop
[INFO] +- org.springframework.boot:spring-boot-starter-security:jar:3.2.6:compile
[INFO] |  +- org.springframework:spring-aop:jar:6.1.8:compile # AOP
[INFO] |  |  \- org.springframework:spring-beans:jar:6.1.8:compile # Beans
[INFO] |  +- org.springframework.security:spring-security-config:jar:6.2.4:compile
[INFO] |  |  \- org.springframework.security:spring-security-core:jar:6.2.4:compile
[INFO] |  |     \- org.springframework.security:spring-security-crypto:jar:6.2.4:compile
[INFO] |  \- org.springframework.security:spring-security-web:jar:6.2.4:compile
[INFO] |     \- org.springframework:spring-expression:jar:6.1.8:compile
2
3
4
5
6
7
8
而在 Spring MVC 开发中,这些依赖都需要手动注入,例如手动的引入 Servlet 依赖(想起了 NEUQHelper,古法注入)
<dependencies>
    <!-- Spring核心依赖 -->
    <dependency>
        <groupId>org.springframework</groupId>
        <artifactId>spring-context</artifactId>
        <version>5.3.20</version> <!-- 需手动指定版本 -->
    </dependency>

    <!-- SpringMVC核心依赖 -->
    <dependency>
        <groupId>org.springframework</groupId>
        <artifactId>spring-webmvc</artifactId>
        <version>5.3.20</version> <!-- 需与Spring核心版本一致 -->
    </dependency>

    <!-- Servlet API(需与容器兼容) -->
    <dependency>
        <groupId>javax.servlet</groupId>
        <artifactId>javax.servlet-api</artifactId>
        <version>3.1.0</version>
        <scope>provided</scope> <!-- 依赖外部Tomcat等容器 -->
    </dependency>

    <!-- 其他依赖(如JSON解析、日志等需手动引入) -->
    <dependency>
        <groupId>com.fasterxml.jackson.core</groupId>
        <artifactId>jackson-databind</artifactId>
        <version>2.13.3</version>
    </dependency>
</dependencies>
2
3
4
5
6
7
8
9
10
11
12
13
14
15
16
17
18
19
20
21
22
23
24
25
26
27
28
29
30
并且,由于没有内置的 Tomcat 容器,其只能打包为 war 包,然后放到独立的 Web 服务器中运行生效
<!-- 需配置插件打包为war,且部署需外部容器 -->
<build>
    <plugins>
        <plugin>
            <groupId>org.apache.maven.plugins</groupId>
            <artifactId>maven-war-plugin</artifactId>
            <version>3.3.2</version>
        </plugin>
    </plugins>
</build>
2
3
4
5
6
7
8
9
10
# Jar 构建与部署
# Jar 包构建与运行
外部的依赖包 jpbc 导出需要配置 maven
<!-- JPBC 打包 -->
<dependency>
    <groupId>jpbc.api</groupId>
    <artifactId>api</artifactId>
    <version>2.0.0</version>
    <scope>system</scope>
    <systemPath>${pom.basedir}/lib/jpbc-api-2.0.0.jar</systemPath>
</dependency>

<dependency>
    <groupId>jpbc-plaf</groupId>
    <artifactId>plaf</artifactId>
    <version>2.0.0</version>
    <scope>system</scope>
    <systemPath>${pom.basedir}/lib/jpbc-plaf-2.0.0.jar</systemPath>
</dependency>
2
3
4
5
6
7
8
9
10
11
12
13
14
15
16
除此以外,Maven 打包将默认不包含<scope>为 system 的包,所以还要额外在 build 插件中配置
<build>
    <plugins>
        <plugin>
            <groupId>org.springframework.boot</groupId>
            <artifactId>spring-boot-maven-plugin</artifactId>
            <version>${spring-boot.version}</version>
            <configuration>
                <mainClass>cia.northboat.auth.AuthApplication</mainClass>
                <skip>false</skip>
                <includeSystemScope>true</includeSystemScope>
            </configuration>
            <executions>
                <execution>
                    <id>repackage</id>
                    <goals>
                        <goal>repackage</goal>
                    </goals>
                </execution>
            </executions>
        </plugin>
    </plugins>
</build>
2
3
4
5
6
7
8
9
10
11
12
13
14
15
16
17
18
19
20
21
22
后台运行
nohup java -jar Auth-Platform-0.0.1-SNAPSHOT.jar &
查看进程
ps -ef | grep java
根据进程号查询
netstat -anop | grep 3802588
根据端口查询状态
netstat -tuln | grep 8080
杀死进程
kill -9 3802588
# 防火墙与 HTTPS
防火墙配置
对于云服务器,首先是控制台要打开,然后是 iptables 规则
sudo iptables -L -n
确保 8080 端口允许外部访问,若不允许用以下命令开放
sudo iptables -A INPUT -p tcp --dport 8080 -j ACCEPT
sudo iptables-save
2
最后检查 ufw
sudo ufw status
sudo ufw allow 8080/tcp
2
添加 HTTPS 规则:其实是因为我打算从博客里请求/image接口去动态的展示随机图片,这个接口从数据库表中随机取一个图片路径,返回图片的二进制流,非常简单捏
但是 GitHub Page 的默认域名,即xxx.github.io强制使用 HTTPS,即我直接在服务器上部署 jar 包(HTTP),他会打不过去,从而加载不了图片
所以需要配置 HTTPS,又因为我没域名,所以只能用自生成的证书,步骤如下
服务器上生成证书
keytool -genkeypair -alias springboot -keyalg RSA -keysize 2048 \
        -dname "CN=localhost, OU=MyOrg, O=MyCompany, L=City, ST=State, C=US" \
        -validity 365 -keystore keystore.p12 -storetype PKCS12 \
        -storepass 123456
2
3
4
会在当前目录得到一个 PKCS12 格式的证书 keystore.p12,将这个证书拷入 resources 目录,对 SpringBoot 配置
server:
  port: 8443
  ssl:
    key-store: classpath:keystore.p12
    key-store-password: "123456"
    key-store-type: PKCS12
    key-alias: springboot
2
3
4
5
6
7
打包上传部署,通过ip:8443进行访问,成功,经测试 GitHub Page 同样允许自编译的 SSL 证书
# Spring Date
数据库中间件集成
# JDBC & Durid
Java Data Base Connector
application.yml 配置 mysql:密码是数字要加双引号
- Hikari 默认,更快
- druid,自带日志监控
- mysql 驱动问题:其中 Drive 在 mysql8.x 版本要加上 cj
spring:
  application:
    name: PostOffice
  datasource:
    username: root
    password: "011026"
    url: jdbc:mysql://39.106.160.174:3306/PostOffice?serverTimezone=UTC&useUnicode=true&characterEncoding=utf-8
    driver-class-name: com.mysql.cj.jdbc.Driver
    type: com.alibaba.druid.pool.DruidDataSource
    filters: stat,wall,log4j
2
3
4
5
6
7
8
9
10
pom.xml
<!--SpringDate-->
<!--jdbc-->
<dependency>
    <groupId>org.springframework.boot</groupId>
    <artifactId>spring-boot-starter-jdbc</artifactId>
</dependency>
<!--MySQL-->
<dependency>
    <groupId>mysql</groupId>
    <artifactId>mysql-connector-java</artifactId>
    <scope>runtime</scope>
</dependency>
<!--日志log4j-->
<dependency>
    <groupId>log4j</groupId>
    <artifactId>log4j</artifactId>
    <version>1.2.17</version>
</dependency>

<!--druid德鲁伊数据源-->
<dependency>
    <groupId>com.alibaba</groupId>
    <artifactId>druid</artifactId>
    <version>1.1.21</version>
</dependency>

<!--测试-->
<dependency>
    <groupId>org.springframework.boot</groupId>
    <artifactId>spring-boot-starter-test</artifactId>
</dependency>
2
3
4
5
6
7
8
9
10
11
12
13
14
15
16
17
18
19
20
21
22
23
24
25
26
27
28
29
30
31
配置后台监控页面
@Configuration
public class DruidConfig {

    @ConfigurationProperties(prefix = "spring.datasource")
    @Bean
    public DataSource druidDataSource(){
        return new DruidDataSource();
    }

    //后台监控
    //相当于web.xml
    @Bean
    public ServletRegistrationBean servlet(){
        ServletRegistrationBean bean = new ServletRegistrationBean<>(new StatViewServlet(), "/druid/*");

        Map<String, String> properties = new HashMap<>();
        properties.put("loginUsername", "admin");
        properties.put("loginPassword", "011026");

        //允许谁能访问
        properties.put("allow", "");
        //禁止谁能访问
        //properties.put("NorthBoat", "39.106.160.174");

        bean.setInitParameters(properties);
        return bean;
    }
}
2
3
4
5
6
7
8
9
10
11
12
13
14
15
16
17
18
19
20
21
22
23
24
25
26
27
28
log4j 报错
log4j:WARN No appenders could be found for logger (org.apache.ibatis.logging.LogFactory).
log4j:WARN Please initialize the log4j system properly.
log4j:WARN See http://logging.apache.org/log4j/1.2/faq.html#noconfig for more info.
2
3
原因:未配置 log4j.properties
log4j.rootLogger=debug, stdout, R

log4j.appender.stdout=org.apache.log4j.ConsoleAppender
log4j.appender.stdout.layout=org.apache.log4j.PatternLayout

# Pattern to output the caller's file name and line number.
log4j.appender.stdout.layout.ConversionPattern=%5p [%t] (%F:%L) - %m%n

log4j.appender.R=org.apache.log4j.RollingFileAppender
log4j.appender.R.File=example.log

log4j.appender.R.MaxFileSize=100KB
# Keep one backup file
log4j.appender.R.MaxBackupIndex=5

log4j.appender.R.layout=org.apache.log4j.PatternLayout
log4j.appender.R.layout.ConversionPattern=%p %t %c - %m%n
2
3
4
5
6
7
8
9
10
11
12
13
14
15
16
17
使用原生 jdbc 进行 CRUD
注意全局查找返回结果类型List<Map<String, Object>>,以及插入列名用飘号括起防止关键字造成sql语句报错
@RestController
public class JDBCController {

    @Autowired
    JdbcTemplate jdbcTemplate;

    @GetMapping("/list")
    public List<Map<String, Object>> list(){
        String sql = "select * from Postman";
        return jdbcTemplate.queryForList(sql);
    }

    @GetMapping("/add")
    public String add(){
        String sql = "insert into PostOffice.Postman(num,`count`,`name`,`to`,`subject`,`text`) values (3,0,'xzt','1543625674@qq.com','hello','hahaha')";
        jdbcTemplate.update(sql);
        return "add ok";
    }
}
2
3
4
5
6
7
8
9
10
11
12
13
14
15
16
17
18
19
# Spring Data Jpa
Maven 依赖
<!-- Spring Boot Starter Data JPA for working with JPA -->
<dependency>
    <groupId>org.springframework.boot</groupId>
    <artifactId>spring-boot-starter-data-jpa</artifactId>
</dependency>

<dependency>
    <groupId>com.mysql</groupId>
    <artifactId>mysql-connector-j</artifactId>
    <scope>runtime</scope>
</dependency>
2
3
4
5
6
7
8
9
10
11
直接继承 JpaRepository 类,自动实现 CRUD 功能,需要将 Pojo 类注解为 Entity,主键注解为 Id 传入(如这里的 User)
@Entity
public class User{
    @Id
    String id;
    String pwd;
}
2
3
4
5
6
Jpa 自带常见的 CRUD 方法
public interface UserRepository extends JpaRepository<User, Long> {
    User findById(String id);
}
2
3
查看源码,还有:flush、save、delete、get、find
public interface JpaRepository<T, ID> extends ListCrudRepository<T, ID>, ListPagingAndSortingRepository<T, ID>, QueryByExampleExecutor<T> {
    void flush();

    <S extends T> S saveAndFlush(S entity);

    <S extends T> List<S> saveAllAndFlush(Iterable<S> entities);

    /** @deprecated */
    @Deprecated
    default void deleteInBatch(Iterable<T> entities) {
        this.deleteAllInBatch(entities);
    }

    void deleteAllInBatch(Iterable<T> entities);

    void deleteAllByIdInBatch(Iterable<ID> ids);

    void deleteAllInBatch();

    /** @deprecated */
    @Deprecated
    T getOne(ID id);

    /** @deprecated */
    @Deprecated
    T getById(ID id);

    T getReferenceById(ID id);

    <S extends T> List<S> findAll(Example<S> example);

    <S extends T> List<S> findAll(Example<S> example, Sort sort);
}
2
3
4
5
6
7
8
9
10
11
12
13
14
15
16
17
18
19
20
21
22
23
24
25
26
27
28
29
30
31
32
33
在 Service 直接调用 UserRepository 就行
@Service
public class UserService implements UserDetailsService {
    private final UserRepository userRepository;

    @Autowired
    public UserService(UserRepository userRepository){
        this.userRepository = userRepository;
    }


    public User findById(String id){
        User user = userRepository.findById(id);
        if(user == null){
            throw new RuntimeException("User not found");
        }
        return user;
    }
}
2
3
4
5
6
7
8
9
10
11
12
13
14
15
16
17
18
# MyBatis
Maven 依赖
<!--mybatis-->
<dependency>
    <groupId>org.mybatis.spring.boot</groupId>
    <artifactId>mybatis-spring-boot-starter</artifactId>
    <version>2.1.1</version>
</dependency>
2
3
4
5
6
Mapper 映射
//这个注解表示这是一个mybatis的mapper类
@Mapper
@Repository
public interface MailMapper {
    List<Postman> queryPostmanList();
    int removePostman(int num);
    int addPostman(Postman postman);
}
2
3
4
5
6
7
8
在启动类中启用 @MapperScan
@SpringBootApplication
@MapperScan("com.northboat.shadow.mapper")
public class PostOfficeApplication {
    public static void main(String[] args) {
        SpringApplication.run(PostOfficeApplication.class, args);
    }
}
2
3
4
5
6
7
配置文件 application.yml
#整合mybatis
mybatis:
  type-aliases-package: com.postoffice.vo
  mapper-locations: classpath:mybatis/mapper/*.xml
2
3
4
一个 Mapper 样例
//这个注解表示这是一个mybatis的mapper类
@Mapper
@Repository
public interface MailMapper {

    List<Mail> queryMailList();

    void removeMail(int num);

    void addMail(Mail mail);

    void updateMailCount(Map<String, Integer> map);
}
2
3
4
5
6
7
8
9
10
11
12
13
对应的 SQL 映射文件 MailMapper.xml,位于resources/mybatis/mapper
传递多个参数用Map封装,用#{key}取值
<?xml version="1.0" encoding="UTF-8" ?>
<!DOCTYPE mapper
        PUBLIC "-//mybatis.org//DTD Mapper 3.0//EN"
        "http://mybatis.org/dtd/mybatis-3-mapper.dtd">
<mapper namespace="com.postoffice.mapper.MailMapper">
    <select id="queryMailList" resultType="Mail">
        select * from `mail`
    </select>

    <delete id="removeMail" parameterType="int">
        delete from mail where `num` = #{num}
    </delete>

    <insert id="addMail" parameterType="Mail">
        insert into mail(`num`, `count`, `name`, `to`, `from`, `subject`, `text`) values(#{num}, #{count}, #{name}, #{to}, #{from}, #{subject}, #{text})
    </insert>

    <update id="updateMailCount" parameterType="java.util.Map">
        update `mail` set `count`=#{count} where `num`=#{num}
    </update>
</mapper>
2
3
4
5
6
7
8
9
10
11
12
13
14
15
16
17
18
19
20
21
resultMap 字段映射
<!-- 通用查询映射结果 -->
<resultMap id="BaseResultMap" type="com.seckill.pojo.User">
    <id column="id" property="id" />
    <result column="nickname" property="nickname" />
    <result column="password" property="password" />
    <result column="slat" property="slat" />
    <result column="head" property="head" />
    <result column="register_date" property="registerDate" />
    <result column="last_login_date" property="lastLoginDate" />
    <result column="login_count" property="loginCount" />
</resultMap>
2
3
4
5
6
7
8
9
10
11
sql id
<!-- 通用查询结果列 -->
<sql id="Base_Column_List">
    id, nickname, password, slat, head, register_date, last_login_date, login_count
</sql>
2
3
4
maven 导出资源问题
<build>
        <resources>
            <resource>
                <directory>src/main/resources</directory>
                <includes>
                    <include>**/*.properties</include>
                    <include>**/*.xml</include>
                </includes>
                <filtering>true</filtering>
            </resource>
            <resource>
                <directory>src/main/java</directory>
                <includes>
                    <include>**/*.properties</include>
                    <include>**/*.xml</include>
                </includes>
                <filtering>true</filtering>
            </resource>
        </resources>
    </build>
2
3
4
5
6
7
8
9
10
11
12
13
14
15
16
17
18
19
20
找不到 Mapper.xml 问题:要用 / 分割
<mappers>
    <mapper resource="com/dao/UserMapper.xml"/>
</mappers>
2
3
或者可以直接使用注解对相应方法进行映射
@Mapper
@Repository
public interface UserMapper {

    /*获取用户列表*/
    @Select("select `name` from `user`")
    List<String> getAllUsersName();

    /*添加用户*/
    @Insert("insert into `user`(`account`, `name`, `password`, `root`, `level`) values(#{account}, #{name}, #{password}, #{root}, #{level})")
    void addUser(User user);

    /*查询用户*/
    //根据昵称查询用户
    @Select("select * from `user` where `name`=#{name}")
    User getUserByName(String name);
    //根据账号查询用户
    @Select("select * from `user` where `account`=#{account}")
    User getUserByAccount(String account);
}
2
3
4
5
6
7
8
9
10
11
12
13
14
15
16
17
18
19
20
# Jedis
导入依赖
<!-- https://mvnrepository.com/artifact/redis.clients/jedis -->
<dependency>
    <groupId>redis.clients</groupId>
    <artifactId>jedis</artifactId>
    <version>4.1.1</version>
</dependency>
2
3
4
5
6
基本使用:方法名与Redis命令保持一致,返回值同样保持一致,告知操作结果
public class Listener {

    private Jedis jedis;
    private String url = "39.106.160.174";
    private int port = 6379;


    private int initRedis(){
        try{
            jedis = new Jedis(url, port);
            jedis.auth("011026");
        } catch (redis.clients.jedis.exceptions.JedisConnectionException e){
            // 若没连接上,将报此错
            return -1;
        }
        return 200;
    }

    public void test(){
        String str = jedis.set("1", "hahaha"); //OK
        long r1 = jedis.expire("1", 3); //1
        long r2 = jedis.del("1"); //1
        long r3 = jedis.del("2"); //0
        long r4 = jedis.del("3"); //0
        jedis.close();
    }
}
2
3
4
5
6
7
8
9
10
11
12
13
14
15
16
17
18
19
20
21
22
23
24
25
26
27
事务:Transaction multi = jedis.multi()
public class Listener {

    private Jedis jedis = new Jedis("39.106.160.174", 6379);

    public void test(){
        Transaction multi = jedis.multi();
        JSONObject jsonObject = new JSONObject();
        jsonObject.put("sad", "NorthBoat");
        jsonObject.put("hello", "hahaha");

        String jsonString = jsonObject.toString();
        try{
            multi.set("user1", jsonString);
            multi.set("user2", jsonString);
            int i = 1/0; //当出现错误,捕获异常后discard,整个事务全不会生效
            multi.exec();
        }catch (Exception e){
            multi.discard();
            e.printStackTrace();
        }finally {
            System.out.println(jedis.get("user1"));
            System.out.println(jedis.get("user2"));
            jedis.del("user1");
            jedis.del("user2");
            jedis.close();
        }
    }

    public static void main(String[] args) {
        Listener listener = new Listener();
        listener.initRedis();
        listener.test();
    }
}
2
3
4
5
6
7
8
9
10
11
12
13
14
15
16
17
18
19
20
21
22
23
24
25
26
27
28
29
30
31
32
33
34
# Spring Data Redis
Redis 的常见用途
- 缓存键值库
- 分布式锁
- 消息队列(简单的发布-订阅场景)
Spring 对 Redis 的整合在Spring-Data项目中,在SpringBoot2.x后,spring-boot-starter-data-redis的底层实现,jedis被替换为了lettuce
- jedis:采用的直连,多个线程操作的话,是不安全的,为了避免不安全,使用 Jedis Pool,像 BIO 模式
- lettuce:采用 netty,实例可以在多个线程中进行共享,不存在线程不安全的情况,可以减少线程数量,更像 NIO 模式,性能更高
注意,Redis 操作的对象一定是需要序列化的,用到了类似 NIO 这样的异步技术,通通需要序列化
一个题外话:如何找到 Spring 的底层配置类?
- Spring Boot 所有的配置类,都有一个自动配置类
- 在外部依赖中找到 Maven: org.springframework.boot:spring-boot-test-autoconfig
- 在其 META-INF 中通过 spring.factories 找到 redis 的自动配置类(ctrl+f 搜索)
- 自动配置类都会绑定一个 properties.class 配置文件
通过上述方法可以找到RedisAutoConfiguration.java,再通过ctrl+b找到RedisProperties.class,该类详细记录了自动配置信息
Maven 依赖
<!-- Redis -->
<dependency>
    <groupId>org.springframework.boot</groupId>
    <artifactId>spring-boot-starter-data-redis</artifactId>
</dependency>
2
3
4
5
Redis 配置
spring:
  data:
    redis:
      host: localhost
      port: 6379
      password: "123456"
2
3
4
5
6
测试
@SpringBootTest
class RemoteControllerServerApplicationTests {

    @Autowired
    private RedisTemplate redisTemplate;

    @Test
    void contextLoads() {
        redisTemplate.opsForValue().set("test", "sad");
        System.out.println(redisTemplate.opsForValue().get("test"));
        redisTemplate.delete("test");
    }
}
2
3
4
5
6
7
8
9
10
11
12
13
redisTemplate常用API
| 方法 | 注释 |
|---|---|
| opsForValue | 操作String |
| opsForList | 操作List |
| opsForSet | 操作Set |
| opsForHash | 操作Hash |
| opsForZSet | 操作ZSet |
同理有opsForGeo等等
# 自定义 RedisTemplate
通常来说,Spring Data Redis 自带的 RedisTemplate 和 StringRedisTemplate 直接注入使用就行,除非需要
- 修改默认的序列化器(默认使用 JdkSerializationRedisSerializer)
- 设置特定的连接池参数
- 定制 Redis 连接属性
才需要自定义 RedisTemplate,以下为自定义过程
新建config包,参照RedisTemplate源码,注入RedisTemplateBean,替换掉默认的RedisTemplate(看过源码得知其上有@ConditionalOnClass注解),简单将 key 修改为 String 类型
- 在规范开发中,所有的 pojo 都是要序列化的,最简单的即继承
Serializable接口,默认使用 JDK 进行序列化 - 只有经过序列化的对象才能进行 NIO 网络传输,我们自定义的
template,最重要的工作便是定义序列化规则,将未经过序列化的对象在template中序列化后成功传输
编写自己的 Redis Template
@Configuration
public class RedisConfig {

    // 一个固定的模板,在工作中可以直接使用,几乎包含了所有场景
    // 编写我们自己的RedisTemplate
    @Bean
    @SuppressWarnings("all")
    public RedisTemplate<String, Object> myRedisTemplate(RedisConnectionFactory redisConnectionFactory) throws UnknownHostException {
        RedisTemplate<String, Object> template = new RedisTemplate<>();
        template.setConnectionFactory(redisConnectionFactory);

        //Json序列化配置
        Jackson2JsonRedisSerializer jackson2JsonRedisSerializer = new Jackson2JsonRedisSerializer(Object.class);
        ObjectMapper objectMapper = new ObjectMapper();
        objectMapper.setVisibility(PropertyAccessor.ALL, JsonAutoDetect.Visibility.ANY);
        //objectMapper.enableDefaultTyping(ObjectMapper.DefaultTyping.NON_FINAL);
        objectMapper.activateDefaultTyping(LaissezFaireSubTypeValidator.instance, ObjectMapper.DefaultTyping.NON_FINAL);
        jackson2JsonRedisSerializer.setObjectMapper(objectMapper);

        //String序列化配置
        StringRedisSerializer stringSerializer = new StringRedisSerializer();

        // key和Hash的key使用String序列化
        template.setKeySerializer(stringSerializer);
        template.setHashKeySerializer(stringSerializer);

        // value和Hash的value使用Jackson序列化
        template.setValueSerializer(jackson2JsonRedisSerializer);
        template.setHashValueSerializer(jackson2JsonRedisSerializer);

        template.afterPropertiesSet();
        return template;
    }
}
2
3
4
5
6
7
8
9
10
11
12
13
14
15
16
17
18
19
20
21
22
23
24
25
26
27
28
29
30
31
32
33
34
Redis 工具类:Bears-OJ | Redis Util (opens new window)
# Thymeleaf
Thymeleaf 模板引擎,用于 View 层数据展示
Maven 依赖
<!--thymeleaf依赖  -->
<dependency>
    <groupId>org.thymeleaf</groupId>
    <artifactId>thymeleaf-spring5</artifactId>
</dependency>
<dependency>
    <groupId>org.thymeleaf.extras</groupId>
    <artifactId>thymeleaf-extras-java8time</artifactId>
</dependency>
2
3
4
5
6
7
8
9
设置不缓存,修改立即生效,否则缓存将影响测试,部署时可改回
spring:
  thymeleaf:
    cache: false
2
3
判断并打印
<div th:text="${msg}"><h1>cnm</h1></div>
提取公共元素
<div th:insert="${commons/commons.html:topbar}"></div>
<div th:replace="${commons/commons.html:topbar}"></div>
2
前端传参:通过<input>标签name标识
<form th:action="@{/submit}" method="post">
    <input type="text" name="key1" placeholder="Enter value for key1" />
    <input type="text" name="key2" placeholder="Enter value for key2" />
    <button type="submit">Submit</button>
</form>
2
3
4
5
后端处理:通过@RequestParam进行取值,前端传来的参数将根据<name, value>自动封装为 map
@RequestMapping("/auth/protocol")
public ResultUtil auth(@RequestParam Map<String, String> params){
    Map<String, String> data = authService.auth(params);
    return ResultUtil.success(data);
}
2
3
4
5
# Spring Security
# 什么是 Spring Security
什么是 Spring Security 捏
- 一个用于保护应用程序的安全性 Java 框架,提供了一套全面的安全解决方案,包括身份验证、授权、防止攻击等功能
- 基于过滤器链的概念,可以轻松地集成到任何基于 Spring 的应用程序中,并且支持多种身份验证选项和授权策略,开发人员可以根据需要选择适合的方式
- 此外,Spring Security 还提供了一些附加功能,如集成第三方身份验证提供商和单点登录,以及会话管理和密码编码等
Maven 依赖
<dependency>
    <groupId>org.springframework.boot</groupId>
    <artifactId>spring-boot-starter-security</artifactId>
</dependency>
2
3
4
在 Spring Boot 3.x 之后,Spring Security 6 废弃了之前继承 WebSecurityConfigurerAdapter 写配置的写法,转而使用基于组件的安全配置,此外,还删除了 authorizeRequests() 并代之以 authorizeHttpRequests() 来定义授权规则(Authorization Rule)
当引入依赖后,项目将自动启用 Spring Security 默认的登录和登出页面/login, /logout,每次启动将在控制台输出密码
Using generated security password: ad3fbd2e-8cde-4cfd-82f9-7e001fb8d05f
然后在登陆页面就可以用user: ad3fbd2e-8cde-4cfd-82f9-7e001fb8d05f进行登录
- 注意此时会默认拦截除了
/login, /logout之外的所有接口
如果想要固定用户名和密码,可以在 application.yaml 中进行配置
security:
	user:
		name: "arkrypto"
		password: "011026"
2
3
4
另外,提供一个默认版本的 Spring Security 配置文件
@Configuration
public class SecurityConfig {
    @Bean
    public SecurityFilterChain filterChain(HttpSecurity http) throws Exception {
        http
                .authorizeHttpRequests(auth -> auth
                        .requestMatchers("/login", "/logout").permitAll() // 放行默认登录、登出页面
                        .anyRequest().authenticated()                     // 拦截其他所有请求
                )
                .formLogin()  // 使用默认登录页
                .and()
                .logout()     // 使用默认登出功能
                .and()
                .csrf().disable(); // 若前端是表单测试建议暂时关闭 CSRF(可根据需要打开)

        return http.build();
    }
}
2
3
4
5
6
7
8
9
10
11
12
13
14
15
16
17
18
以上配置将拦截除了/login, /logout以外的所有接口,并启用默认的登陆页面,当然了,你不进行这个配置类的装配,默认也就是这样,这里只是给出一个初始版本而已,之后的修改将在这之上进行
# UserDetailService 实例
通过数据库表 User 进行登陆权限认证
pojo,需要声明为 Entity
@Data
@AllArgsConstructor
@NoArgsConstructor
@Entity
public class User {
    @Id
    private String id;
    private String pwd;
}
2
3
4
5
6
7
8
9
dao,继承 JpaRepository
public interface UserRepository extends JpaRepository<User, Long> {
    User findById(String id);
}
2
3
4
security,自定义 UserDetails
public class CustomUserDetails implements UserDetails {
    private String id;
    private String pwd;
    private Collection<? extends GrantedAuthority> authorities;

    // 构造函数
    public CustomUserDetails(String id, String pwd, Collection<? extends GrantedAuthority> authorities) {
        this.id = id;
        this.pwd = pwd;
        this.authorities = authorities;
    }

    @Override
    public Collection<? extends GrantedAuthority> getAuthorities() {
        return authorities;
    }

    @Override
    public String getPassword() {
        return pwd;
    }

    @Override
    public String getUsername() {
        return id;
    }

    @Override
    public boolean isAccountNonExpired() {
        return true; // 账号是否过期
    }

    @Override
    public boolean isAccountNonLocked() {
        return true; // 账号是否被锁定
    }

    @Override
    public boolean isCredentialsNonExpired() {
        return true; // 密码是否过期
    }

    @Override
    public boolean isEnabled() {
        return true; // 账号是否可用
    }
}
2
3
4
5
6
7
8
9
10
11
12
13
14
15
16
17
18
19
20
21
22
23
24
25
26
27
28
29
30
31
32
33
34
35
36
37
38
39
40
41
42
43
44
45
46
47
Service,继承 UserDetailsService,实现 loadUserByUsername 方法,返回一个 UserDetails 类
@Service
public class UserService implements UserDetailsService {
    private final UserRepository userRepository;

    @Autowired
    public UserService(UserRepository userRepository){
        this.userRepository = userRepository;
    }

    @Override
    public UserDetails loadUserByUsername(String id) throws UsernameNotFoundException {
        // 从数据库获取用户
        User user = userRepository.findById(id); // 你可以根据id来查找用户
        if (user == null) {
            throw new UsernameNotFoundException("User not found");
        }

        // 这里你可以根据需要设置权限,暂时设置一个默认角色
        return new CustomUserDetails(user.getId(), user.getPwd(), Collections.singletonList(new SimpleGrantedAuthority("ROLE_USER")));
    }
}
2
3
4
5
6
7
8
9
10
11
12
13
14
15
16
17
18
19
20
21
# SecurityConfig 配置
Config,在配置类中 @Bean 通过 authenticationManager 方法注入
@Configuration
@EnableWebSecurity
public class SecurityConfig {

    private UserService userService;

    @Autowired
    public SecurityConfig(UserService userService){
        this.userService = userService;
    }

    // 规定单向编码方式
    @Bean
    public PasswordEncoder passwordEncoder() {
        return new BCryptPasswordEncoder();
    }

    // 用户权限拦截
    @Bean
    public AuthenticationManager authenticationManager(HttpSecurity http) throws Exception {
        AuthenticationManagerBuilder authenticationManagerBuilder =
                http.getSharedObject(AuthenticationManagerBuilder.class);
        authenticationManagerBuilder.userDetailsService(userService)
                .passwordEncoder(passwordEncoder());  // 配置 UserDetailsService 和密码编码器
        return authenticationManagerBuilder.build();
    }
}
2
3
4
5
6
7
8
9
10
11
12
13
14
15
16
17
18
19
20
21
22
23
24
25
26
27
页面拦截和资源放行,同样 @Bean 通过 securityFilterChain 方法链式注入
@Configuration
@EnableWebSecurity
public class SecurityConfig {
    @Bean
    public SecurityFilterChain securityFilterChain(HttpSecurity http) throws Exception {
        http
                .authorizeHttpRequests()
                        .requestMatchers("/login", "/image", "/assets/**", "/images/**").permitAll()
                    .anyRequest().authenticated()
                .and()
                .formLogin()
                    .loginPage("/login")
                    .loginProcessingUrl("/customLogin")
                    .defaultSuccessUrl("/home")  // 登录成功后跳转到主页
                    .failureUrl("/login?error=true")  // 登录失败后跳转回登录页面
                    .permitAll()
                .and()
                .logout()
                    .logoutUrl("/logout")
                    .logoutSuccessUrl("/login?logout=true")
                    .invalidateHttpSession(true)  // 注销时使HTTP会话失效
                    .clearAuthentication(true)  // 清除认证信息
                    .deleteCookies("JSESSIONID");  // 删除会话中的cookie(比如JSESSIONID)

        return http.build();
    }
}
2
3
4
5
6
7
8
9
10
11
12
13
14
15
16
17
18
19
20
21
22
23
24
25
26
27
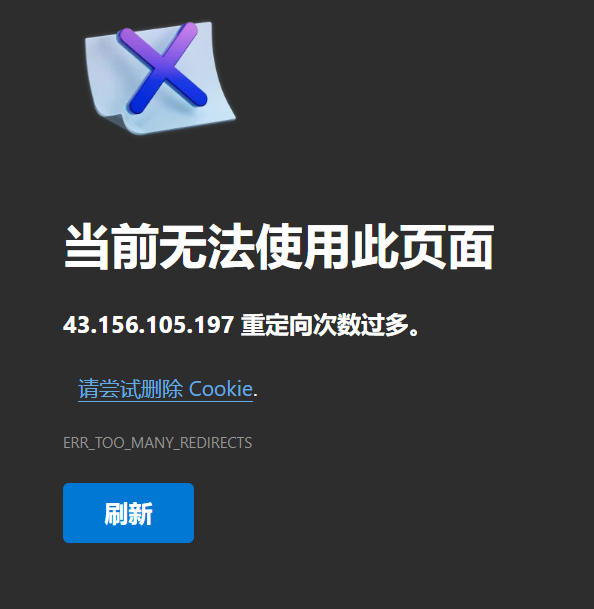
注意,通常要把 css、js 等静态资源放行,否则可能会出现难以复现的重定向问题
遇到了一个问题,部署后登录时发生重定向次数过多
疑似是跳转登