
 数据分析基础
# Python 基础
# 包管理
uv python 版本管理
brew install uv
uv --version
uv python install 3.12          # 装官方 standalone 3.12 到 ~/.local/share/uv/python/
uv python list
uv run python -V
uv python insatll 3.12 --default # 建立软链,让全局 python 为 uv 的版本
2
3
4
5
6
在项目里使用特定版本 python,这是目录层次的管理
uv python install 3.15
uv python pin 3.15
uv venv                       # 按 pin 的版本建 .venv
uv add requests               # 装依赖,自动写进 pyproject + uv.lock
uv add --dev pytest           # dev 依赖
uv remove requests
uv sync                       # 按 lock 文件还原环境(换机/拉代码后跑这个)
uv lock --upgrade             # 更新依赖版本
2
3
4
5
6
7
8
用 uv pip 代替 pip,直接 pip3 会指向 MAC CLT 的 python3.9 的 pip
uv pip install requests       # 需在激活的 venv 里
uv pip install -r requirements.txt
uv pip list
uv pip uninstall requests
uv pip freeze > requirements.txt
uv pip install requests --python .venv/bin/python   # 不激活也能指定目标环境
2
3
4
5
6
运行 python
uv run python main.py         # 自动用项目 .venv 或按 .python-version 建临时环境
uv run pytest
2
其实最常用的姿势就四条
uv venv按 pin 住的版本新建项目uv add安装依赖包uv run运行 pythonuv sync同步依赖
为什么不用 conda?重死了,我只是个臭开发
# 基础语法
运算符
# ---------- 身份运算 ----------
a = [1, 2]
b = a
c = [1, 2]
print(a is b)      # True,同一对象
print(a is c)      # False,不同对象
print(a is not c)  # True

# ---------- 成员运算 ----------
lst = [1, 2, 3]
print(2 in lst)     # True
print(4 not in lst) # True
# 注意:in 相当于容器内的包含,不是 instanceof(那是 isinstance)

# ---------- 算术运算 ----------
print(10 // 3)   # 3,向下取整(地板除)
print(10 % 3)    # 1,取余数(常用)
print(2 ** 4)    # 16,幂运算

# ---------- 逻辑运算 ----------
x, y = 5, 10
print(x > 0 and y < 20)  # True
print(x > 10 or y < 20)  # True
print(not x > 10)        # True
2
3
4
5
6
7
8
9
10
11
12
13
14
15
16
17
18
19
20
21
22
23
24
字符串获取长度
length = len(cur)
分割字符串
#通过空格分割字符串str为字符串数组
str.split(" ")
2
数字转字符串
str(number)
用 [ : ] 截取字符串,含头不含尾
sentence = "我打你妈的"
print(sentence[2:5])
#将会输出 “你妈的”
2
3
return 和 yield
- return 是阻塞的,单线程的,和 Java 中 return 保持一致
- 而 yield 是非阻塞的,如下列函数通过 yield 返回
def user_input():
    while True:
        s = input()
        if not s:
            return
        yield s

for line in map(str.upper, user_input()):
    print(line)
2
3
4
5
6
7
8
9
yield 非阻塞,这意味着获得值后,将新开辟一条线程立即返回,继续执行之后的代码,同时这个函数继续运行,如上述代码的执行顺序为
hello
HELLO
world
WORLD
2
3
4
类、函数和继承
# ---------- self ----------
# self 代表实例本身,类方法第一个参数必须是 self(约定)
class Test:
    def prt(self):
        print(self)          # 实例对象
        print(self.__class__)  # 类名

t = Test()
t.prt()  # 调用时 self 自动传入


# ---------- 命名规范 ----------
class NamingDemo:
    _protected = "保护类型"      # 单下划线:protected,子类可访问
    __private = "私有类型"       # 双下划线:private,仅本类内部可访问

    def __init__(self):
        self.__private = "只能类内访问"

    def __special__(self):      # 首尾双下划线:特殊方法(系统定义)
        return "特殊方法,如 __init__"


# ---------- 类的继承 ----------
class Parent:
    parent_attr = 100

    def __init__(self):
        print("调用父类构造函数")

    def parent_method(self):
        print("调用父类方法")

    def set_attr(self, val):
        Parent.parent_attr = val

    def get_attr(self):
        print("父类属性:", Parent.parent_attr)


class Child(Parent):           # 子类继承父类
    def __init__(self):
        super().__init__()     # 调用父类构造(Python3 写法)
        print("调用子类构造方法")

    def child_method(self):
        print("调用子类方法")


c = Child()
c.child_method()   # 调用子类方法
c.parent_method()  # 调用父类方法
c.set_attr(200)    # 修改父类属性
c.get_attr()       # 获取父类属性
2
3
4
5
6
7
8
9
10
11
12
13
14
15
16
17
18
19
20
21
22
23
24
25
26
27
28
29
30
31
32
33
34
35
36
37
38
39
40
41
42
43
44
45
46
47
48
49
50
51
52
53
54
不定长参数:带星号的参数即为不定长参数
def printinfo( arg1, *vartuple ):
    "打印任何传入的参数"
    print "输出: "
    print arg1
    for var in vartuple:
        print var
        return
# 调用printinfo 函数
printinfo( 10 ) printinfo( 70, 60, 50 )
2
3
4
5
6
7
8
9
# 常用函数
计算
# ---------- 内置数学函数 ----------
print(abs(-10))        # 10,绝对值
print(max(3, 1, 5))    # 5,最大值(可传序列)
print(min(3, 1, 5))    # 1,最小值(可传序列)
print(pow(2, 4))       # 16,等价于 2**4

# sqrt 需导入 math 模块
import math
print(math.sqrt(9))    # 3.0,平方根
2
3
4
5
6
7
8
9
随机数:import random
import random

# ---------- random 模块 ----------
random.seed(42)                    # 设置随机种子(固定随机结果,便于复现)
print(random.random())             # [0, 1) 随机浮点数
print(random.choice([1, 2, 3]))    # 从序列中随机选一个元素
2
3
4
5
6
数学
import math

# ---------- 常量 ----------
print(math.pi)          # 3.14159...,圆周率
print(math.e)           # 2.71828...,自然常数

# ---------- 角度 / 弧度 转换 ----------
print(math.radians(180))  # 3.14159...,角度 → 弧度
print(math.degrees(math.pi))  # 180.0,弧度 → 角度

# ---------- 三角函数(输入为弧度) ----------
print(math.sin(math.pi / 2))   # 1.0,正弦
print(math.cos(0))             # 1.0,余弦
print(math.tan(math.pi / 4))   # 0.999... ≈ 1.0,正切

# ---------- 反三角函数(返回弧度) ----------
print(math.asin(1.0))   # 1.5707... (π/2),反正弦
print(math.acos(1.0))   # 0.0,反余弦
print(math.atan(1.0))   # 0.7853... (π/4),反正切
print(math.atan2(1, 1)) # 0.7853...,y/x 的反正切(考虑象限)

# ---------- 欧几里得范数 ----------
print(math.hypot(3, 4)) # 5.0,sqrt(3*3 + 4*4)
2
3
4
5
6
7
8
9
10
11
12
13
14
15
16
17
18
19
20
21
22
23
类型转换
# ---------- 类型转换 ----------
print(int("10"))          # 10,字符串 → 整数
print(int("1010", 2))     # 10,二进制字符串 → 整数(指定进制)
print(float("3.14"))      # 3.14,字符串 → 浮点数
print(str(100))           # "100",整数 → 字符串

# ---------- 序列 / 容器 转换 ----------
print(list("abc"))        # ['a', 'b', 'c'],字符串 → 列表
print(set([1, 2, 2, 3]))  # {1, 2, 3},去重→集合
print(dict([("a",1), ("b",2)]))  # {'a': 1, 'b': 2},键值对序列 → 字典
print(tuple([1,2,3]))     # (1, 2, 3),列表 → 元组

# ---------- 字符 / ASCII 转换 ----------
print(ord('A'))           # 65,字符 → 整数(ASCII码)
print(chr(65))            # 'A',整数 → 字符

# ---------- 进制转换 ----------
print(hex(255))           # "0xff",整数 → 十六进制字符串
print(oct(8))             # "0o10",整数 → 八进制字符串
print(bin(5))             # "0b101",整数 → 二进制字符串(Python 3 通用)

# ---------- 注意 ----------
# Python 3 已移除 long 和 unichr:
# long → int(Python 3 int 可以存放任意精度整数)
# unichr → chr(Python 3 默认 Unicode)
2
3
4
5
6
7
8
9
10
11
12
13
14
15
16
17
18
19
20
21
22
23
24
25
输入输出
name = input("请输入姓名: ")      # 输入,可带提示
print("hello", name, end="\t")   # 输出,end 指定结尾(默认 \n)
print("world")                   # 输出(自动换行)
2
3
ASCII 码
print(ord("A"))    # 65,字符 → ASCII
print(chr(65))     # "A",ASCII → 字符
2
URL 编码
from urllib import parse

text = "hello 世界"
print(parse.quote(text))          # "hello%20%E4%B8%96%E7%95%8C",URL 编码
print(parse.unquote("%E4%B8%96")) # "世",URL 解码
print(parse.urlencode({"a": 1, "b": 2}))  # "a=1&b=2",字典 → 查询字符串
2
3
4
5
6
# I/O 和命令执行
I/O 流处理
with open(path+"shadow.conf", 'r') as f:
    for line in f.readlines():
        info = line.strip().split(":")
        tag = info[0].strip()
        content = info[1].strip()
        if(tag == "name"):
            name = content
        elif tag == "email":
            email = content
        elif tag == "password":
            pwd = content
2
3
4
5
6
7
8
9
10
11
重写
def write_conf(self, name, email, pwd):
    with open(path+"shadow.conf", 'w') as f:
        f.write("name: " + name + "\n")
        f.write("email: " + email + "\n")
        f.write("password: " + pwd + "\n")
2
3
4
5
追加
def log(content):
    with open(path+"shadow.log", 'a') as f:
        f.write(content)
2
3
命令执行并获得返回执行结果
import subprocess

def subprocess_popen(statement):
    p = subprocess.Popen(statement, shell=True, stdout=subprocess.PIPE)
    while p.poll() is None:
        if p.wait() != 0:
            return "命令执行失败"
        else:
            re = p.stdout.readlines()
            result = ''
            for i in range(len(re)):
                line = re[i].decode('utf-8').strip(' ')
                result += line
            return result

print(subprocess_popen("s"))
2
3
4
5
6
7
8
9
10
11
12
13
14
15
16
阻塞的连续执行:这里的 stdout 和 stderr 都是阻塞的,开启两条线程去专门读这个阻塞内容,在主线程中写入命令
import subprocess

p = subprocess.Popen("/bin/bash", shell=True, stdin=subprocess.PIPE, stderr=subprocess.PIPE, stdout=subprocess.PIPE)
def stdout():
    global p
    while True:
        setback(p.stdout.readline().decode('utf8').strip() + " ")

def stderr():
    global p
    while True:
        setback(p.stderr.readline().decode('utf8').strip() + " ")

cmd_back = ""

def setback(str):
    global cmd_back
    global back_finished
    cmd_back += str

def getback():
    global cmd_back
    global back_finished
    result = cmd_back
    cmd_back = ""
    return result.strip()

import threading
out = threading.Thread(target=stdout)
out.daemon = True
err = threading.Thread(target=stderr)
err.daemon = True
out.start()
err.start()

import os
import time
# 执行命令行
def cmd(statement):
    global p
    global back_finished
    statement += os.linesep
    p.stdin.write(statement.encode('utf8'))
    p.stdin.flush()
    time.sleep(1)
    return getback()
2
3
4
5
6
7
8
9
10
11
12
13
14
15
16
17
18
19
20
21
22
23
24
25
26
27
28
29
30
31
32
33
34
35
36
37
38
39
40
41
42
43
44
45
46
# PyQt
安装
pip install PyQt5
UI 类模板
class Ui_Dialog(object):
    def setupUi(self, Dialog):
        Dialog.setObjectName("Dialog")
        Dialog.resize(400, 300)

        # 控件:QLabel / QLineEdit / QPushButton / QTextEdit / QGroupBox
        self.btn = QtWidgets.QPushButton(Dialog)
        self.btn.setGeometry(QtCore.QRect(60, 257, 75, 23))
        self.btn.setObjectName("btn")

        self.retranslateUi(Dialog)
        # 信号-槽绑定
        self.btn.clicked.connect(Dialog.handle_click)
        QtCore.QMetaObject.connectSlotsByName(Dialog)

    def retranslateUi(self, Dialog):
        _translate = QtCore.QCoreApplication.translate
        Dialog.setWindowTitle(_translate("Dialog", "标题"))
        self.btn.setText(_translate("Dialog", "按钮"))
2
3
4
5
6
7
8
9
10
11
12
13
14
15
16
17
18
19
窗口类(封装 UI + 业务逻辑)
class MyDialog(QDialog):
    switch_window = QtCore.pyqtSignal()  # 信号:用于窗口跳转

    def __init__(self, parent=None):
        super(QDialog, self).__init__(parent)
        self.ui = Ui_Dialog()
        self.ui.setupUi(self)

    def handle_click(self):
        text = self.ui.textEdit.toPlainText()   # 获取输入
        self.ui.textEdit.setText("反馈内容")     # 设置输出
        self.switch_window.emit()               # 发射信号 → 跳转窗口
2
3
4
5
6
7
8
9
10
11
12
窗口管理
class Controller:
    def show_login(self):
        self.login = LoginDialog()
        self.login.switch_window.connect(self.show_main)  # 信号→跳转
        self.login.show()

    def show_main(self):
        self.login.close()
        self.window = MainDialog()
        self.window.show()
2
3
4
5
6
7
8
9
10
主入口
if __name__ == "__main__":
    app = QApplication(sys.argv)
    ctrl = Controller()
    ctrl.show_login()
    sys.exit(app.exec_())
2
3
4
5
打包(pyinstaller)
pip install pyinstaller
pyinstaller -F -w app.py        # -F 单文件,-w 无控制台
pyinstaller -D app.py           # -D 文件夹模式
2
3
# Spider
爬虫(Spider):就是一个网络请求(get / post)回 html 然后过滤所需信息
import requests
from bs4 import BeautifulSoup

r = requests.get('https://www.baidu.com/')
print(r.status_code)
# print(r.text)
# print(r.json())

# 添加headers
# headers = {'User-Agent': 'Mozilla/5.0 (iPhone; CPU iPhone OS 11_0 like Mac OS X) AppleWebKit'}
# r = requests.get('https://www.baidu.com/', headers=headers)
# print(r.text)

data = {'user': 'northboat', 'password': '123456'}
r_post = requests.post('https://www.weibo.com/', data=data)
print(r_post.status_code)
# print(r_post.text)

html = """
<html><head><title>The Dormouse's story</title></head>
<body>
<p class="title" name="dromouse"><b>The Dormouse's story</b></p>
<p class="story">Once upon a time there were three little sisters; and their names were
<a href="http://example.com/elsie" class="sister" id="link1"><!-- Elsie --></a>,
<a href="http://example.com/lacie" class="sister" id="link2">Lacie</a> and
<a href="http://example.com/tillie" class="sister" id="link3">Tillie</a>;
and they lived at the bottom of a well.</p>
<p class="story">...</p>
"""
soup = BeautifulSoup(html, 'lxml')
print(soup.title)
print(soup.title.text)
# 根据标签定位
print(soup.find_all('a'))
# 根据属性定位,这里即为找到id为link1的标签
print(soup.find_all(attrs={'id': 'link1'}))
# 根据标签加属性进行定位
print(soup.find_all('a', id='link2'))
2
3
4
5
6
7
8
9
10
11
12
13
14
15
16
17
18
19
20
21
22
23
24
25
26
27
28
29
30
31
32
33
34
35
36
37
38
Hu の 爬虫
from bs4 import BeautifulSoup

file = input("请输入文件名: ")

with open("./" + "file" + ".html", 'r', encoding='utf-8') as f:
    soup = BeautifulSoup(f.read(), 'html.parser')
    titles = soup.find_all('div', class_="cusField p archive_no")
    names = soup.find_all('div', class_="cusField p title")
    positions_a = soup.find_all('div', class_="cusField p official_position_a")
    positions_b = soup.find_all('div', class_="cusField p official_position_b")
    langs = soup.find_all('div', class_="cusField p language")
    keys = soup.find_all('div', class_="cusField p keywords")

n = len(titles)

for i in range(n):
    print("档号: " + titles[i].text)
    print("题名: " + names[i].text)
    print("官职爵位A: " + positions_a[i].text)
    print("官职爵位B: " + positions_b[i].text)
    print("文字种类: " + langs[i].text)
    print("主题词: " + keys[i].text)
    print("=============")
2
3
4
5
6
7
8
9
10
11
12
13
14
15
16
17
18
19
20
21
22
23
# 后端开发
# 中间件
# Redis
安装依赖
pip install redis
拿取连接并写入字符串
import redis
# redis 连接池
pool = redis.ConnectionPool(host='localhost', port=6379, decode_responses=True, max_connections=4)   # host是redis主机,需要redis服务端和客户端都起着 redis默认端口是6379

def redis_format(str):
    return '\"' + str + '\"'


# 通过 redis 共享内存回送消息
def send_back(msg):
    # 从池子中拿一个链接
    conn = redis.Redis(connection_pool=pool, decode_responses=True)
    conn.set(name, msg);
    conn.close()
2
3
4
5
6
7
8
9
10
11
12
13
14
# RabbitMQ
安装
pip install pika
声明队列并开启监听,监听需要传入处理函数exec
import pika
import subprocess
import requests
import urllib

# 准备必要数据
path = "./shadow/"
name = ""
email = ""
pwd = ""
with open(path+"shadow.conf", 'r') as f:
    for line in f.readlines():
        info = line.strip().split(":")
        tag = info[0].strip()
        content = info[1].strip()
        if(tag == "name"):
            name = content
        elif tag == "email":
            email = content
        elif tag == "password":
            pwd = content

# 连接 rabbitmq 开始监听,处理函数为 exec
def shadow():
    # 用于判断是否已登录,防止用户手动键入 login 命令引发错误
    #login = False

    # 统一消息处理函数,执行完成才说明接收完成,此时才可以接收下一条,串行
    def exec(v1, v2, v3, bodyx):
        #global login
        # 将从消息队列接收的字符串格式化
        command = str(bodyx,'utf-8')
        print("收到询问: " + command)
        # 处理命令并获取结果
        if command[0] == '/':
            if command[1:]  == "cache":
                # print("进来了")
                result = get_history()
            elif command[1:].split(" ")[0] == "login":
                result = login(command[1:].split(" ")[1].strip())
            else:
                result = subprocess_popen(command[1:])
        else:
            result = chat(command)

        print("处理结果: ", result)
        # 返回结果
        send_back(redis_format(result))
        # 记录缓存
        cache(command, result)

    # mq建立连接
    userx = pika.PlainCredentials("guest","guest")
    conn = pika.BlockingConnection(pika.ConnectionParameters("127.0.0.0",5672,'/',credentials=userx))
    # 开辟管道
    channelx = conn.channel()
    #声明队列,参数为队列名
    channelx.queue_declare(queue = name)


    # 初始化消息队列
    channelx.basic_consume(queue = name, #队列名
                        on_message_callback = exec, #收到消息的回调函数
                        auto_ack = True #是否发送消息确认
                        )

    print("-------- 开始接收数据 -----------")
    # 开始接收消息
    log("\n" + str(datetime.now().strftime("%Y-%m-%d %H:%M:%S")) + "\n")
    channelx.start_consuming()
2
3
4
5
6
7
8
9
10
11
12
13
14
15
16
17
18
19
20
21
22
23
24
25
26
27
28
29
30
31
32
33
34
35
36
37
38
39
40
41
42
43
44
45
46
47
48
49
50
51
52
53
54
55
56
57
58
59
60
61
62
63
64
65
66
67
68
69
70
# MySQL
安装
pip install pymysql
基本使用
import pymysql

conn = pymysql.connect(host = '127.0.0.1' # 连接名称,默认127.0.0.1
            ,user = 'root' # 用户名
            ,passwd='011026' # 密码
            ,port= 3306 # 端口,默认为3306
            ,db='aides' # 数据库名称
            ,charset='utf8' # 字符编码
        )
cur = conn.cursor() # 生成游标对象
sql = "select * from `user` where `name`= " + '\'' + name + '\'' # SQL语句
#print(sql)
cur.execute(sql) # 执行SQL语句
data = cur.fetchall() # 通过fetchall方法获得数据
cur.close()
conn.close()
2
3
4
5
6
7
8
9
10
11
12
13
14
15
16
# Flask
基础使用:api 返回,html 模板文件跳转,静态文件跳转
from flask import Flask, render_template

@app.route('/')
def index():
    return render_template('index.html') # 访问模板 templates 中的 index.html
    # return app.send_static_file('index.html') 跳转静态文件 static 中的 index.html

@app.route('/cross')
def hello_pycharm():
    return f'Hello, PyCharm!'

@app.route('/hello')
def hello_world():
    return 'Hello Flask!'

if __name__ == '__main__':
    # 默认为5000端口
    app.run()
    # app.run(port=8000)
2
3
4
5
6
7
8
9
10
11
12
13
14
15
16
17
18
19
html 文件中静态资源的引入
<link rel="stylesheet" href="static/normalize.min.css">
<link rel="stylesheet" href="static/style.css">
<script  src="static/script.js"></script>
2
3
解决跨域问题
pip install flask-cors
开启全局跨域
from flask_cors import CORS
CORS(app, supports_credentials=True)
2
单条 api 跨域
from flask_cors import *

@app.route('/')
@cross_origin(supports_credentials=True)
def hello():
    return f'Hello, NMSL!'
2
3
4
5
6
# GPT API
from flask import Flask, request

app = Flask(__name__)
openai.api_key = "OPENAI_API_KEY"

@app.route('/chat', methods=['POST'])
def chat():
    text = request.json.get('text')
    response = openai.ChatCompletion.create(
        model="gpt-3.5-turbo",
        messages=[{"role": "user", "content": text}]
    )
    # print(response)
    answer = response.choices[0].message['content']
    print(text, answer)
    # print(message)
    return answer

if __name__ == '__main__':
    app.run(debug=True)
2
3
4
5
6
7
8
9
10
11
12
13
14
15
16
17
18
19
20
前端 ajax 请求,注意规定请求头
<button onclick="send()" id="send" class="primary">Send</button>

<script>
    function send(){
        let text = document.getElementById("text").value
        //console.log(text)
        let data = {"text": text}
        show("Client", text)
        console.log(data)
        $.ajax({
            url: "/chat",
            type: "post",
            headers: {
                "Content-Type":"application/json"
            },
            data: JSON.stringify(data),
            success: function (data) {
                console.log(data)
                show("Shadow", data)
            },
        })
    }
</script>
2
3
4
5
6
7
8
9
10
11
12
13
14
15
16
17
18
19
20
21
22
23
# 数据科学库
# Numpy
import numpy as np
创建数组
# 从列表创建
np.array([1, 2, 3])                 # 一维
np.array([[1,2],[3,4]])             # 二维

# 快捷创建
np.zeros((3,4))                     # 全0
np.ones((3,4), dtype=np.int32)      # 全1
np.empty((3,4))                     # 空(近似0)
np.arange(10, 21, 2)                # [10,12,14,16,18,20]
np.linspace(0, 11, 12)              # 等分12份

# 随机
np.random.random((2,4))             # (0,1) 随机浮点
np.random.rand(100)                 # (0,1) 随机浮点
np.random.randn(6,4)                # 标准正态分布
np.random.uniform(-1,1,(N,2))       # (-1,1) 均匀分布
np.random.seed(42)                  # 固定随机种子
2
3
4
5
6
7
8
9
10
11
12
13
14
15
16
17
属性与变形
arr.ndim        # 维度
arr.shape       # (行,列)
arr.size        # 元素总数
arr.reshape((2,3))   # 重塑(总数不变)
arr.flatten()        # 展平为一维
arr.T                # 转置
2
3
4
5
6
索引与切片
arr[0]          # 第一行
arr[0][0]       # 第一行第一列
arr[1, 1:3]     # 第1行第1~2列
arr[:, np.newaxis]   # 转为列向量
arr[np.newaxis, :]   # 转为行向量
2
3
4
5
运算
# 逐元素运算
arr + 3         # 加法
arr * 3         # 数乘
arr ** 2        # 幂
np.sin(arr)     # 三角函数

# 矩阵乘法
np.dot(A, B)    # 矩阵乘法
A.dot(B)        # 同上

# 统计
np.sum(arr)                     # 总和
np.sum(arr, axis=1)             # 按行求和(axis=1 行,axis=0 列)
np.max(arr), np.min(arr)        # 最大/小值
np.argmax(arr), np.argmin(arr)  # 最大/小值索引
np.mean(arr), np.median(arr)    # 均值/中位数
np.sort(arr)                    # 逐行排序

# 裁剪
np.clip(arr, 5, 9)              # <5变5,>9变9
2
3
4
5
6
7
8
9
10
11
12
13
14
15
16
17
18
19
20
合并与分割
np.vstack((A, B))    # 上下合并
np.hstack((A, B))    # 左右合并
np.concatenate((A,B), axis=0)   # axis=0纵向,axis=1横向

np.split(A, 2, axis=1)          # 等量分割
np.array_split(A, 3, axis=1)    # 不等量分割
2
3
4
5
6
赋值与拷贝
B = A               # 引用(指向同一内存)
B = A.copy()        # 深拷贝(独立副本)
2
常用函数
np.bincount(arr)                # 统计索引出现次数
np.bincount(arr, weights=w)     # 加权统计
np.argmax(np.bincount(x))       # 众数

np.around(arr, decimals=1)      # 四舍五入到指定位数
np.floor(arr)                   # 向下取整
np.ceil(arr)                    # 向上取整
np.where(cond, x, y)            # 条件为真用x,否则用y
2
3
4
5
6
7
8
广播机制:形状不同的数组运算时,自动扩展补齐
# Scipy
from scipy import constants as C
import scipy.special as S
from scipy import optimize
from scipy import spatial
2
3
4
常量
C.c                     # 真空光速
C.h                     # 普朗克常数
C.physical_constants["electron mass"]  # 物理常量(值,单位,误差)
C.mile, C.inch, C.gram, C.pound
2
3
4
特殊函数
S.log1p(x)              # log(1+x),高精度
S.ellipj(u, m)          # 雅可比椭圆函数
2
非线性方程组求解
def f(x):
    x0, x1, x2 = x.tolist()
    return [5*x1+3, 4*x0**2-2*sin(x1*x2), x1*x2-1.5]

result = optimize.fsolve(f, [1,1,1])   # 初始值[1,1,1]
2
3
4
5
最小二乘拟合
def residuals(p):
    k, b = p
    return Y - (k*X + b)

r = optimize.leastsq(residuals, [1,0])  # 初始值 k=1,b=0
k, b = r[0]
2
3
4
5
6
空间算法:最近邻搜索
kd = spatial.cKDTree(points)        # 构建KD树
dist, idx = kd.query(targets, 3)    # 最近3个点
idx2 = kd.query_ball_point(targets, r)  # 半径r内的点
pairs = kd.query_pairs(r)           # 距离<r的点对
2
3
4
# Pandas
import pandas as pd
import numpy as np
2
Series
s = pd.Series([1,3,6,np.nan,44,1], index=[6,5,4,3,2,1])
s.index = [1,2,3,4,5,6]
2
# DataFrame
创建
dates = pd.date_range('2018-08-19', periods=6)
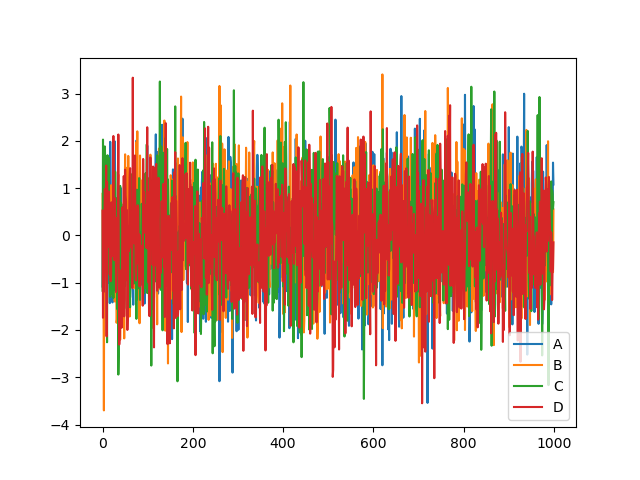
df = pd.DataFrame(np.random.randn(6,4), index=dates, columns=['A','B','C','D'])

# 从字典创建
df2 = pd.DataFrame({
    'A': 1.,
    'B': pd.Timestamp('20130102'),
    'C': pd.Series(1, index=list(range(4)), dtype='float32'),
    'D': np.array([3]*4, dtype='int32'),
    'E': pd.Categorical(["test","train","test","train"]),
    'F': 'foo'
})
2
3
4
5
6
7
8
9
10
11
12
属性
df.T                # 转置
df['A']             # 取列
df.A                # 取列
df.index            # 行索引
df.columns          # 列名
df.values           # 数据(numpy数组)
df.describe()       # 统计摘要
2
3
4
5
6
7
排序
df.sort_index(axis=1, ascending=False)  # 按索引排序
df.sort_values(by='C', ascending=False) # 按值排序
2
选择数据
# 列
df['A']              # 单列
df.loc[:, 'A':'C']   # 多列

# 行
df[0:3]              # 切片(含头不含尾)
df.loc['2022-07-09']           # 按标签(行名)
df.iloc[3]                     # 按位置

# 行列组合
df.loc['20220707', 'A':'C']
df.iloc[3:5, 1:3]
df.iloc[[1,3,5], 1:3]

# 条件筛选
df[df.A > 8]
df.loc[df.A > 8]
2
3
4
5
6
7
8
9
10
11
12
13
14
15
16
17
| 方法 | 说明 |
|---|---|
loc | 按标签(行名/列名)索引 |
iloc | 按位置(整数下标)索引 |
设置值
df.iloc[0,0] = 23                    # 单个元素
df.iloc[0] = 'nmsl'                  # 整行
df.iloc[:,1] = 'hahaha'              # 整列
df.iloc[[1,2]] = 1                   # 多行
df.loc[:, ['B','C']] = 2             # 多列
df.loc['20220712'] = [24,25,26,27]   # 添加行

# 条件设置
df.loc[df.A > 4, 'B'] = np.nan

# 添加列
df['E'] = pd.Series([1,2,3,4,5,6], index=pd.date_range('20220706', periods=6))
2
3
4
5
6
7
8
9
10
11
12
处理缺失数据
df.dropna()                          # 删除含NaN的行
df.dropna(axis=1, how='any')         # 删除含NaN的列
df.fillna(value=0)                   # NaN填充为0
df.isnull()                          # 布尔矩阵(是否为NaN)
df.isna()                            # 同上
df.isna().any()                      # 各列是否有缺失
np.any(df.isnull())                  # 整表是否有缺失
2
3
4
5
6
7
导入导出
pd.read_csv('student.csv')           # 读CSV
data.head(3), data.tail(4)           # 前3行/后4行
data.to_pickle('student.pickle')     # 导出pickle
pd.read_pickle('student.pickle')     # 读pickle
2
3
4
# 合并
Concat(拼接)
# 上下合并
pd.concat([df1, df2, df3], axis=0, ignore_index=True)

# 左右合并
pd.concat([df5, df6], axis=1)

# 外连接/内连接
pd.concat([df3, df4], join='outer')   # 缺省填NaN
pd.concat([df3, df4], join='inner')   # 只保留共有列

# append
df1.append(df2, ignore_index=True)
df1.append([df2, df9], ignore_index=True)
df1.append(s, ignore_index=True)      # s为Series
2
3
4
5
6
7
8
9
10
11
12
13
14
Merge(关联)
pd.merge(left, right, on='key')                    # 按列合并
pd.merge(left, right, on=['key1','key2'])          # 多列合并
pd.merge(left, right, how='outer')                 # 外连接
pd.merge(left, right, left_index=True, right_index=True)  # 按索引合并
pd.merge(boys, girls, on='k', suffixes=['_boy','_girl'])  # 重名列加后缀
2
3
4
5
| 参数 | 说明 |
|---|---|
on | 连接的列名 |
how | inner/outer/left/right |
left_index/right_index | 是否用索引连接 |
suffixes | 重名列后缀 |
indicator | 添加列标注连接方式 |
可视化
data.plot()                          # Series/DataFrame绘图
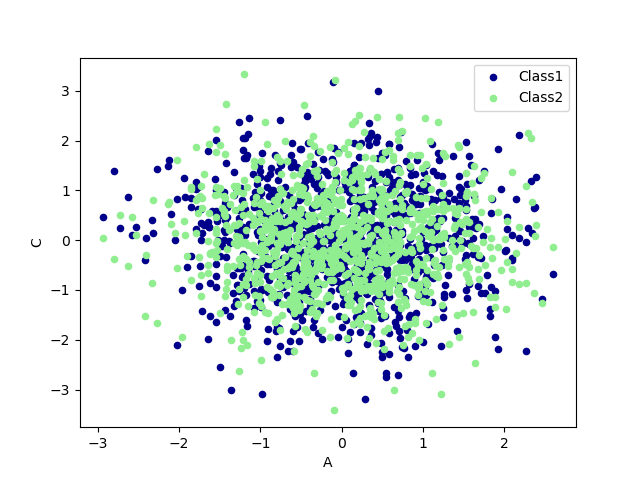
data.plot.scatter(x='A', y='B')      # 散点图
plt.show()                           # 展示
2
3
# Matplotlib
import matplotlib.pyplot as plt
import numpy as np
2
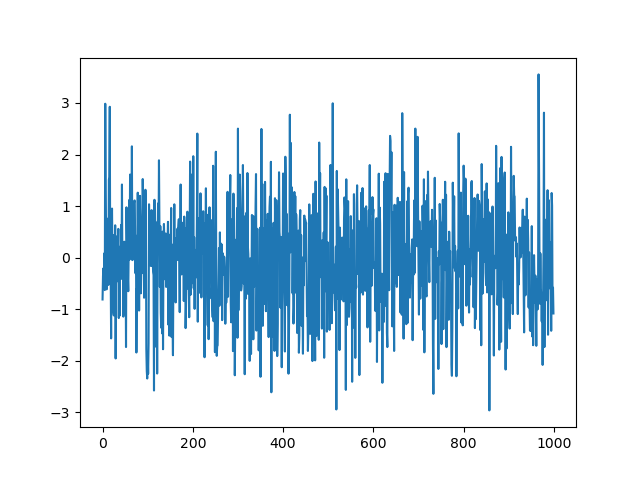
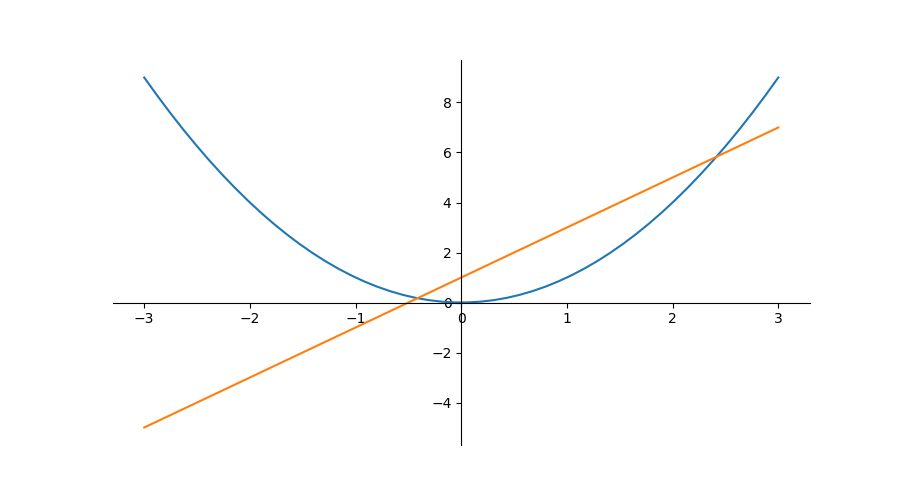
Figure 画布
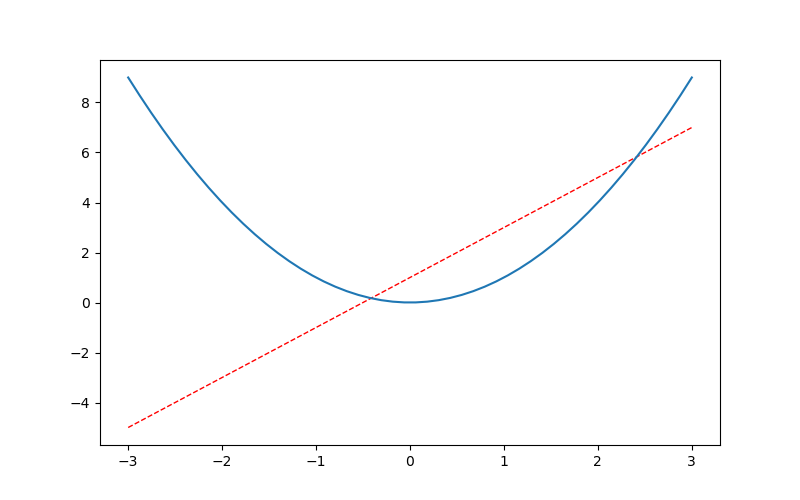
plt.figure(num=4, figsize=(8,5))     # num=图名, figsize=(宽,高)
plt.plot(x, y1, color='red', linewidth=1.0, linestyle='--')
plt.plot(x, y2)
plt.show()
2
3
4

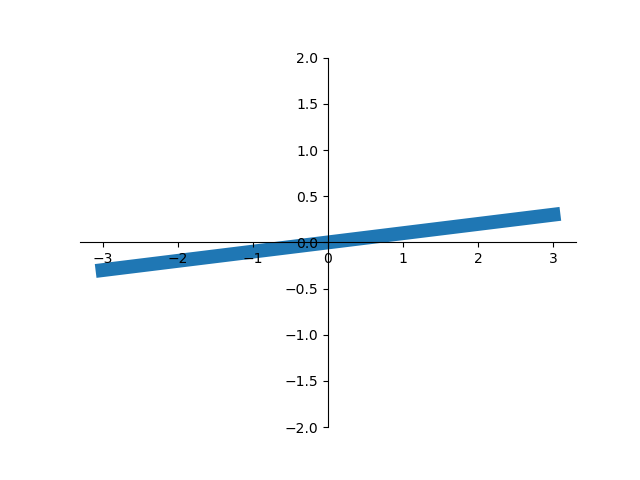
坐标轴设置
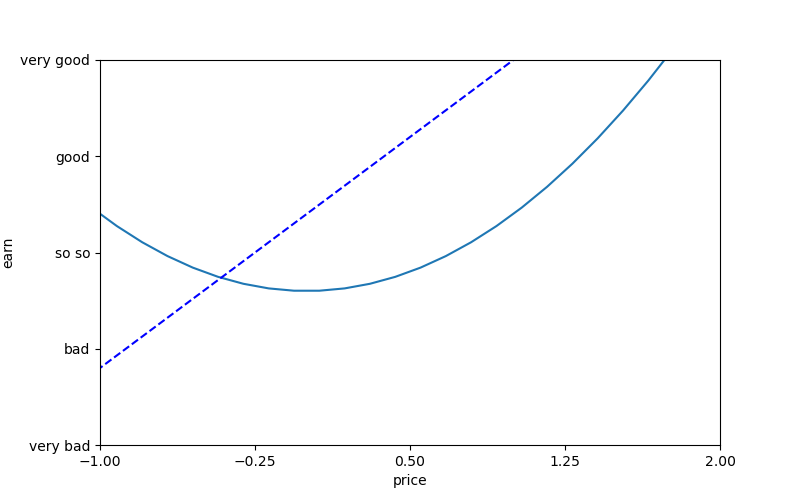
plt.xlim(-1,2), plt.ylim(-2,3)       # 轴范围
plt.xlabel('price'), plt.ylabel('earn')  # 轴标签
plt.xticks(np.linspace(-1,2,5))      # 刻度
plt.yticks([-2,-1,0,1,2], ['very bad','bad','so so','good','very good'])

ax = plt.gca()                       # 获取当前轴
ax.spines['top'].set_color('none')   # 隐藏上边框
ax.spines['right'].set_color('none') # 隐藏右边框
ax.spines['bottom'].set_position(('data',0))  # x轴过原点
ax.spines['left'].set_position(('data',0))    # y轴过原点
2
3
4
5
6
7
8
9
10
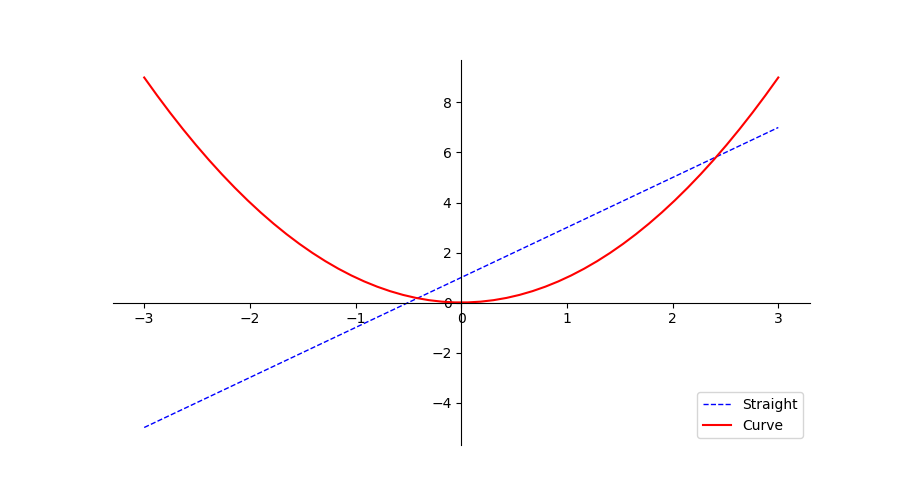
图例 Legend
l1, = plt.plot(x, y1, color='blue')  # ,= 取出迭代器唯一元素
l2, = plt.plot(x, y2, color='red')
plt.legend(handles=[l1,l2], labels=['Straight','Curve'], loc='lower right')
2
3
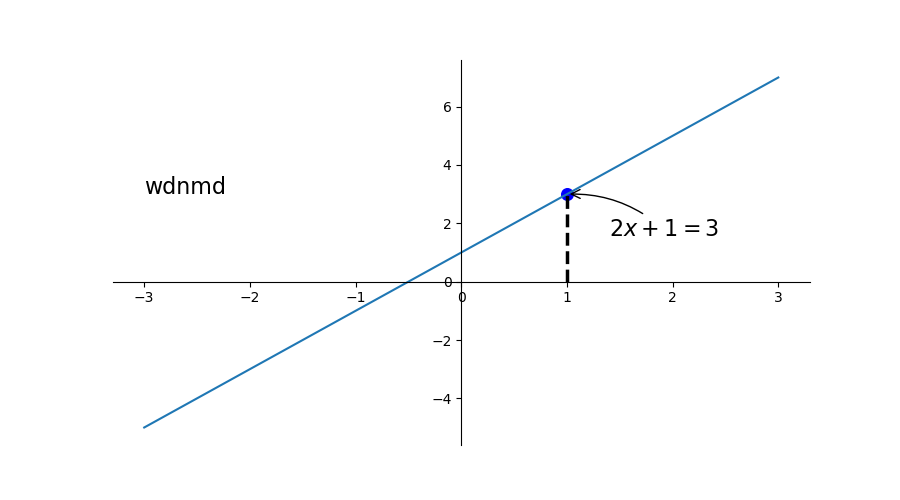
标注
# 散点
plt.scatter(x0, y0, s=40, color='b') # s=点大小

# 虚线
plt.plot([x0,x0],[0,y0], ls='--', lw=2.5, c='r')

# 箭头标注
plt.annotate(r'$2x+1=%s$'%y0,
             xy=(x0,y0), xycoords='data',
             xytext=(+30,-30), textcoords='offset points',
             fontsize=16,
             arrowprops=dict(arrowstyle='->', connectionstyle='arc3,rad=.2'))

# 文字
plt.text(-3, 3, 'wdnmd', fontdict={'size':'16', 'color':'black'})
2
3
4
5
6
7
8
9
10
11
12
13
14
15

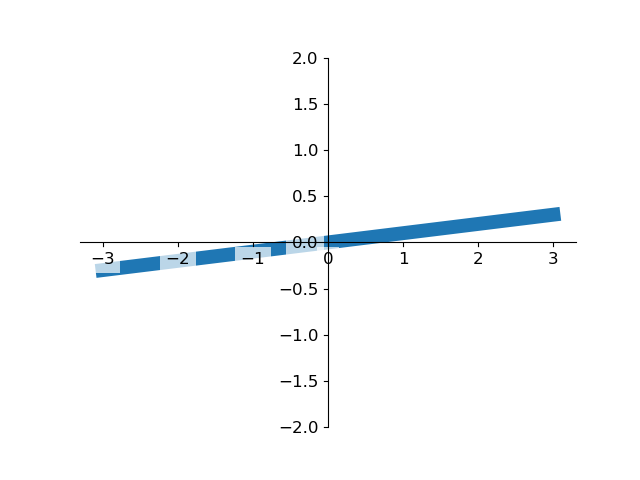
Tick 透明度调整
for label in ax.get_xticklabels() + ax.get_yticklabels():
    label.set_fontsize(12)
    label.set_bbox(dict(facecolor='white', edgecolor='none', alpha=0.7))
2
3
# Seaborn
对 Matplotlib 的进一步封装,用于统计可视化。
- 官网:https://seaborn.pydata.org/
- 教程:https://www.runoob.com/matplotlib/seaborn-tutorial.html